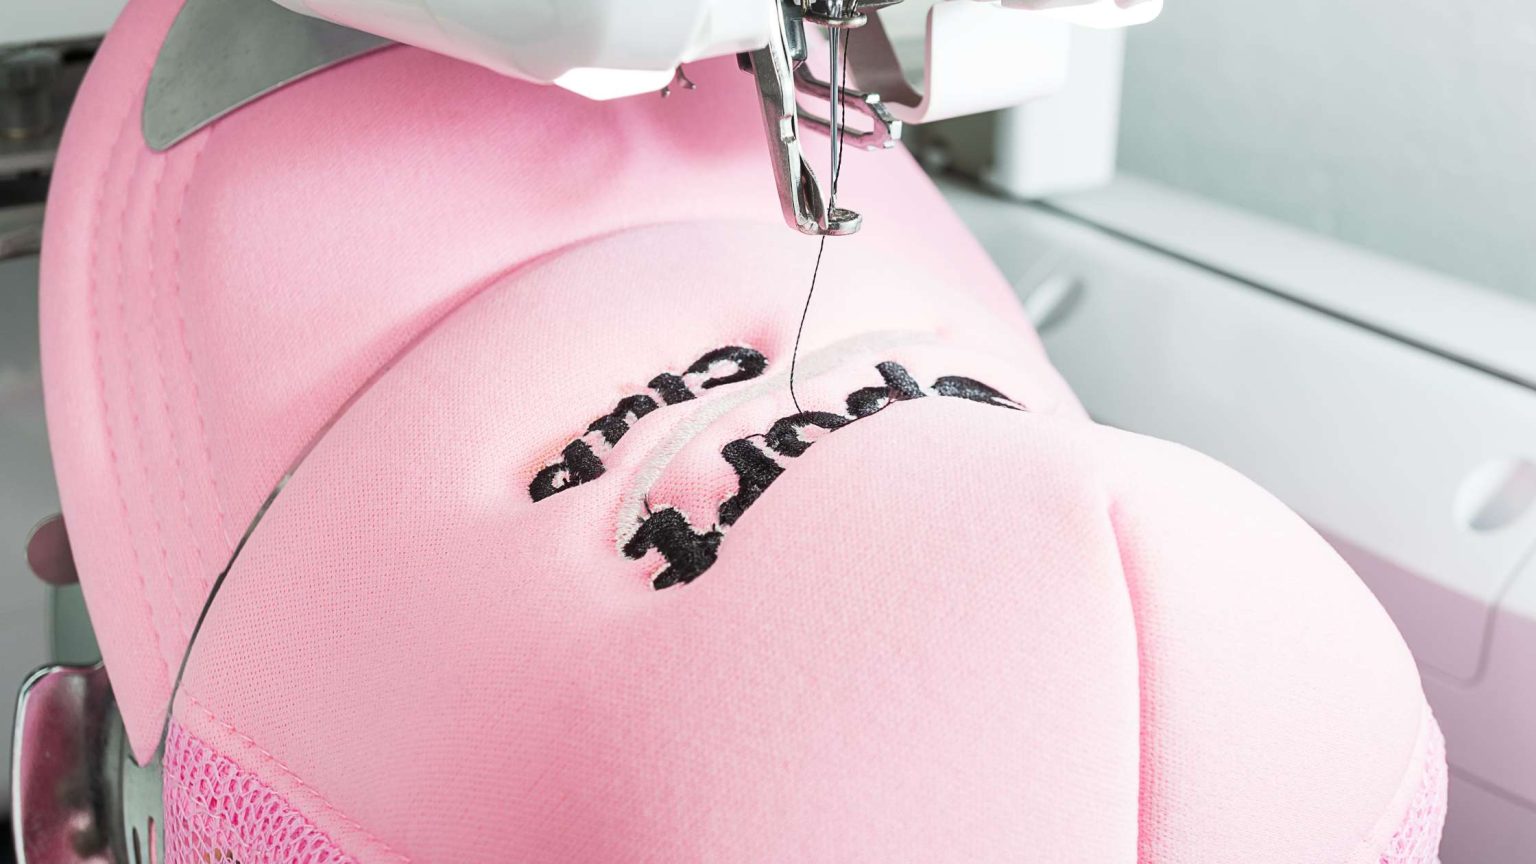
Struggling to make those tiny letters on your machine embroidery look flawless? Let’s navigate the intricate world of small lettering together.
From choosing the right needle and thread to mastering stitch density, there’s a plethora of expert tips waiting for you.
But remember, the key to unlocking the secrets of small lettering lies in…
Needle and Thread Selection
When choosing needles and threads for your machine embroidery projects, consider the type of fabric and design complexity. For delicate fabrics like silk or satin, use a finer needle to prevent damage, while heavier fabrics like denim require a sturdier needle for proper stitching. Match the thread weight to your fabric; lighter threads work best for intricate designs on thin fabrics, while heavier threads are suitable for bold designs on thicker materials. Opt for polyester or rayon threads for their strength and vibrant colors, ensuring longevity in your embroidered pieces.
For intricate designs with small lettering, a finer needle paired with a high-quality embroidery thread is essential for achieving crisp and clear details. Remember to adjust your tension settings accordingly to prevent puckering or thread breakage. Experiment with different needle and thread combinations on scrap fabric before starting your main project to ensure the best results.
Remember, the right needle and thread selection can make a significant difference in the quality and longevity of your machine embroidery projects.
Hoop Size Considerations
Considering the dimensions of your embroidery design, select a hoop size that accommodates the entire pattern without overcrowding. A hoop that’s too small may cause the design to be compressed or distorted, while a hoop that’s too large might lead to excess fabric being caught during embroidery, resulting in a messy final product. It’s important to find a balance where the design fits comfortably within the hoop, allowing for smooth and precise stitching.
Smaller lettering or intricate details may require a smaller hoop size to ensure that the machine can accurately capture all the fine elements of the design. Conversely, larger fonts or bolder patterns will need a larger hoop to prevent any parts of the design from being cut off during the embroidery process. By choosing the right hoop size for your specific design, you can achieve crisp and well-executed small lettering on your machine embroidery projects.
Stitch Density Adjustment
To ensure optimal results in your machine embroidery projects, adjusting the stitch density is crucial for achieving the desired outcome. Here are some tips for stitch density adjustment:
- Increase Density for Smaller Lettering: When working with small letters, increasing the stitch density can help maintain the clarity and legibility of the text.
- Decrease Density for Larger Designs: On the other hand, for larger designs, reducing the stitch density can prevent the design from looking too bulky or stiff.
- Test and Adjust: It’s essential to test different stitch densities on scrap fabric before embroidering your final design. This way, you can fine-tune the density to suit the specific requirements of your project.
Thread Tension Management
Managing thread tension is a crucial aspect of ensuring high-quality results in your machine embroidery projects. Proper thread tension ensures that the stitches are balanced, avoiding loose loops or tight pulls that can distort the design. To manage thread tension effectively, start by adjusting the tension settings on your machine.
Test the tension by embroidering a small sample before starting on your actual project. If the stitches appear uneven or the thread breaks frequently, it may be a sign that the tension needs to be adjusted. Make small changes to the tension settings until you achieve the desired results. Additionally, using high-quality thread and needles can also help in maintaining optimal tension throughout the embroidery process.
By paying attention to thread tension management, you can enhance the overall quality and appearance of your small lettering designs on machine embroidery.
Digitizing Techniques for Clarity
When digitizing for clarity in machine embroidery, ensure each stitch is meticulously crafted to enhance the design’s definition and sharpness. To achieve the best results, consider the following:
- Use Proper Underlay: Begin with a solid foundation by incorporating the right underlay stitches. This helps stabilize the fabric and ensures that the top stitches lay smoothly and uniformly.
- Optimize Stitch Density: Adjust the stitch density to suit the size and intricacy of the design. Too few stitches can result in gaps, while too many can cause the design to become stiff and bulky.
- Pay Attention to Stitch Direction: Ensure that the stitches follow the natural flow of the design to enhance clarity and readability. Consistent stitch direction can prevent distortion and maintain the integrity of the lettering or intricate details.
Affordable Digitizing Will Be Your Reliable Partner On Your Journey Through Small Lettering Embroidery Projects
With the right tools and techniques, mastering small lettering in machine embroidery is within reach.
Remember to carefully select your needle and thread, consider hoop size, adjust stitch density, manage thread tension, and utilize digitizing techniques for clarity.
Practice, patience, and perseverance will lead you to flawless results.
So go ahead, dive into the world of precision and creativity with confidence. Your small lettering embroidery projects are sure to shine.
For expert guidance on thread tension management and other embroidery techniques, contact Affordable Digitizing at (586) 817-9611.